- Published on
Creating a Raspberry Pi Tank with Live Video Feed
- Authors

- Name
- UjjwalBgn
Overview
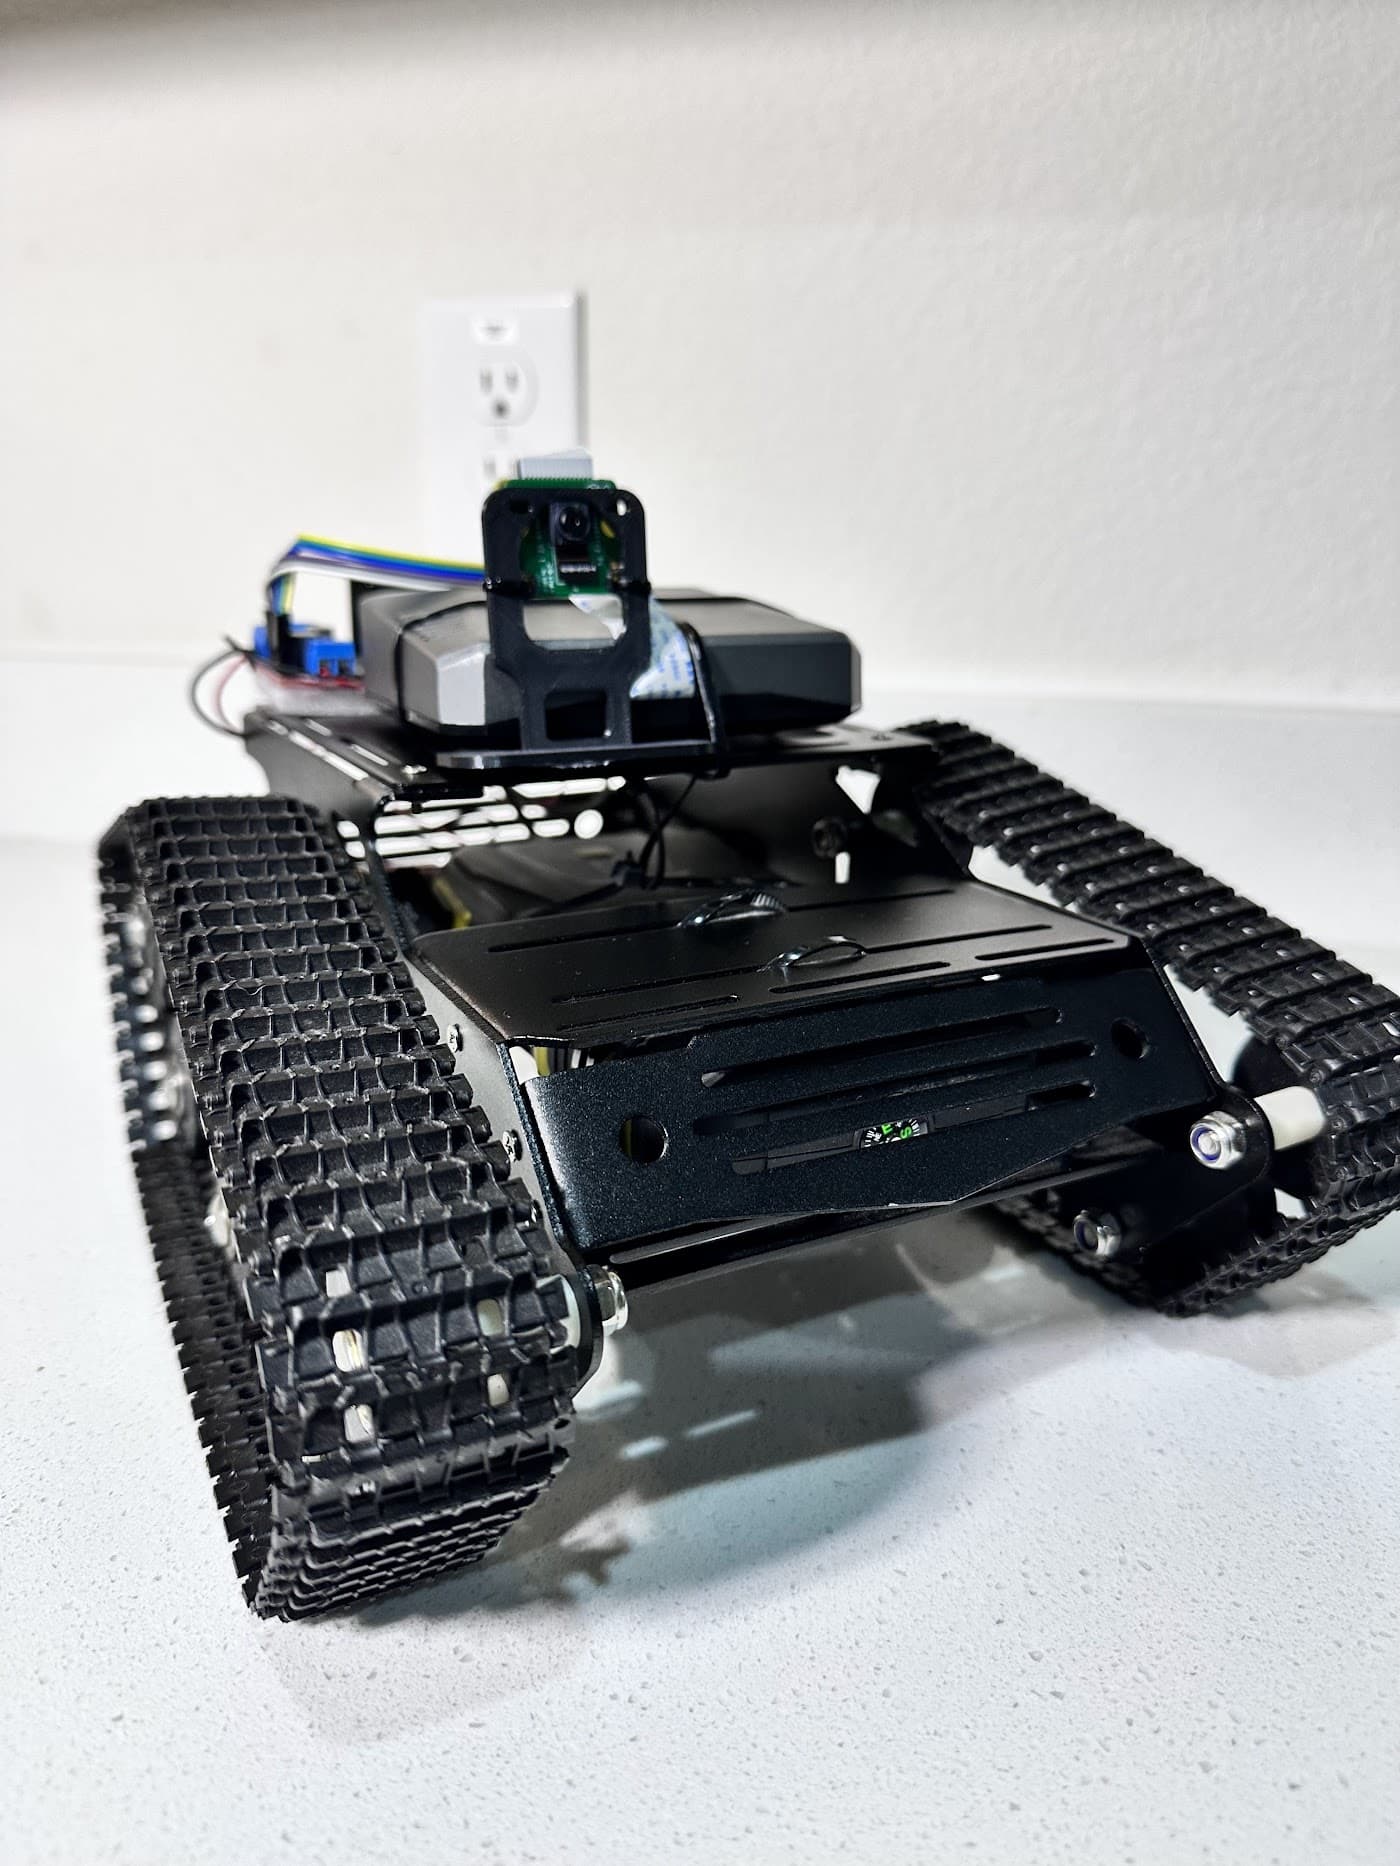
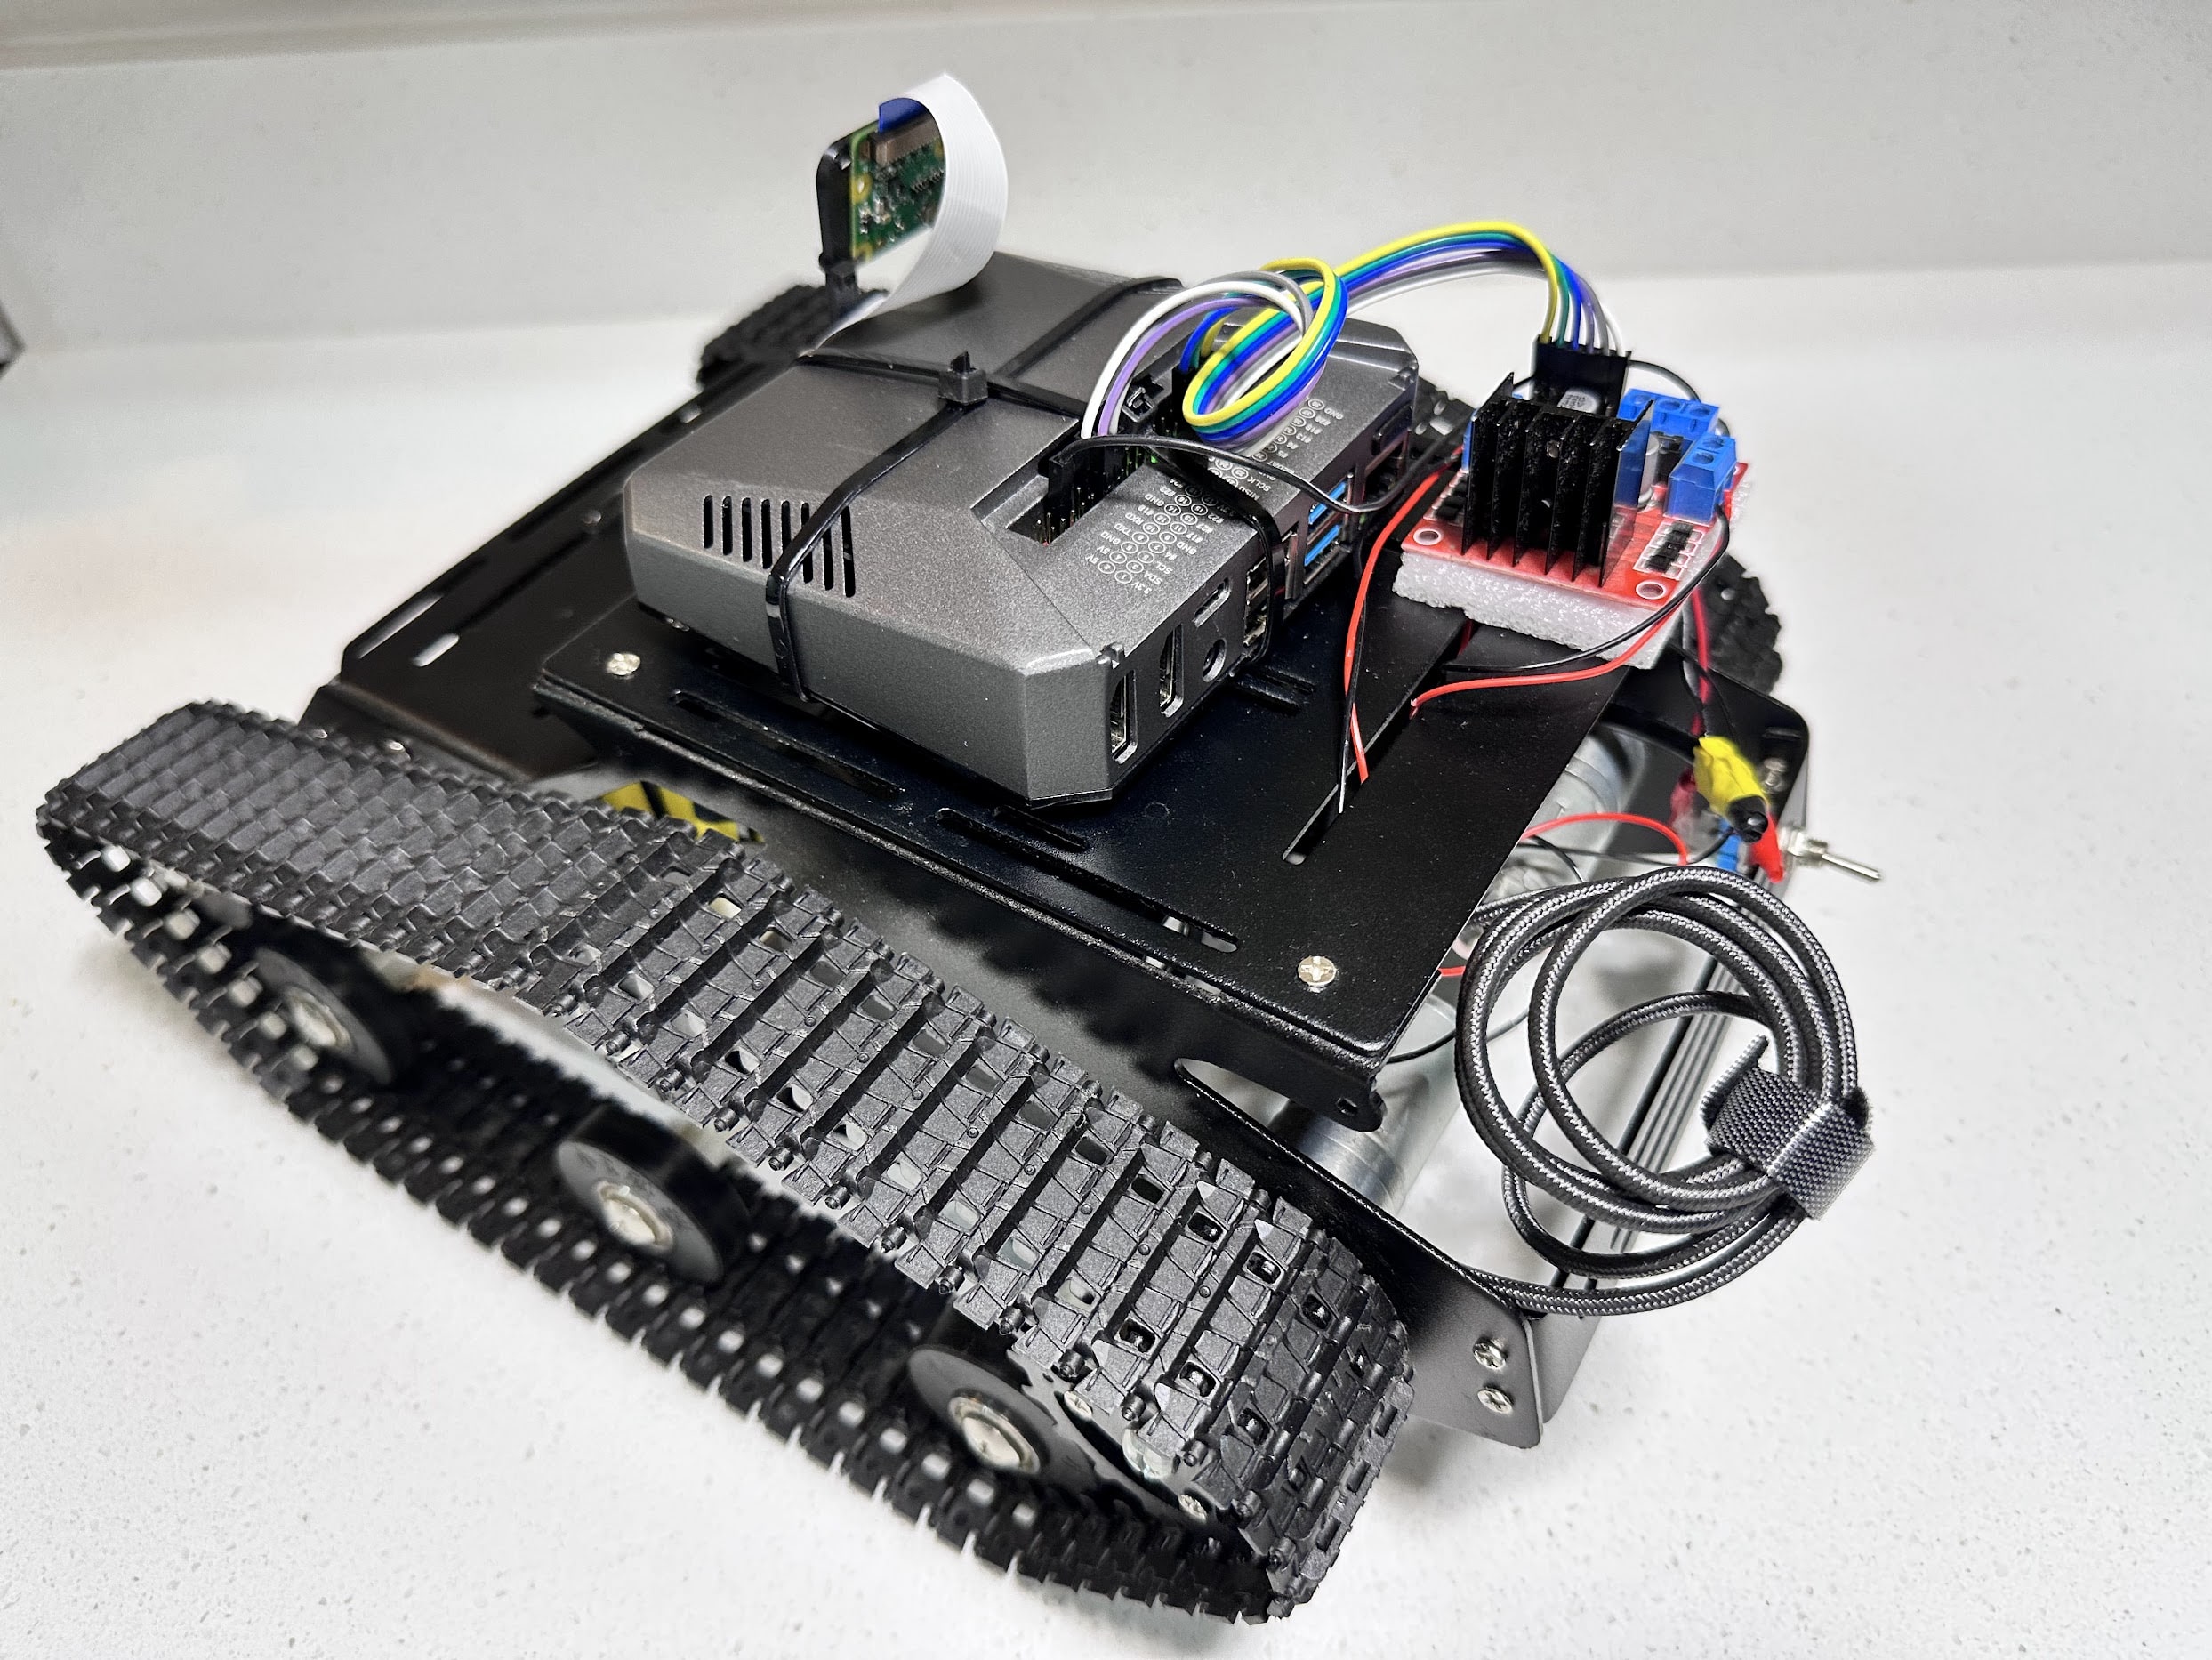
This tutorial walks you through creating your own Raspberry Pi-powered tank featuring live video streaming and browser-based controls. I used a Raspberry Pi 4B, an L298N motor driver, a 12V car jumpstarter as the power source, a tank frame purchased from Amazon, and a Pi Camera V2. You can substitute similar parts depending on what's available to you, such as using a power bank or sourcing the tank frame from AliExpress
Parts Needed
- Raspberry Pi
- L298N Motor Driver
- 12V Power Source (car jumpstarter, power bank, battery pack)
- Tank chassis (Amazon or AliExpress)
- Raspberry Pi Camera Module V2
- Jumper wires
Software Dependencies
You need to install several Python packages to get started:
sudo apt update
sudo apt install python3-picamera2 python3-opencv python3-flask python3-rpi.gpio
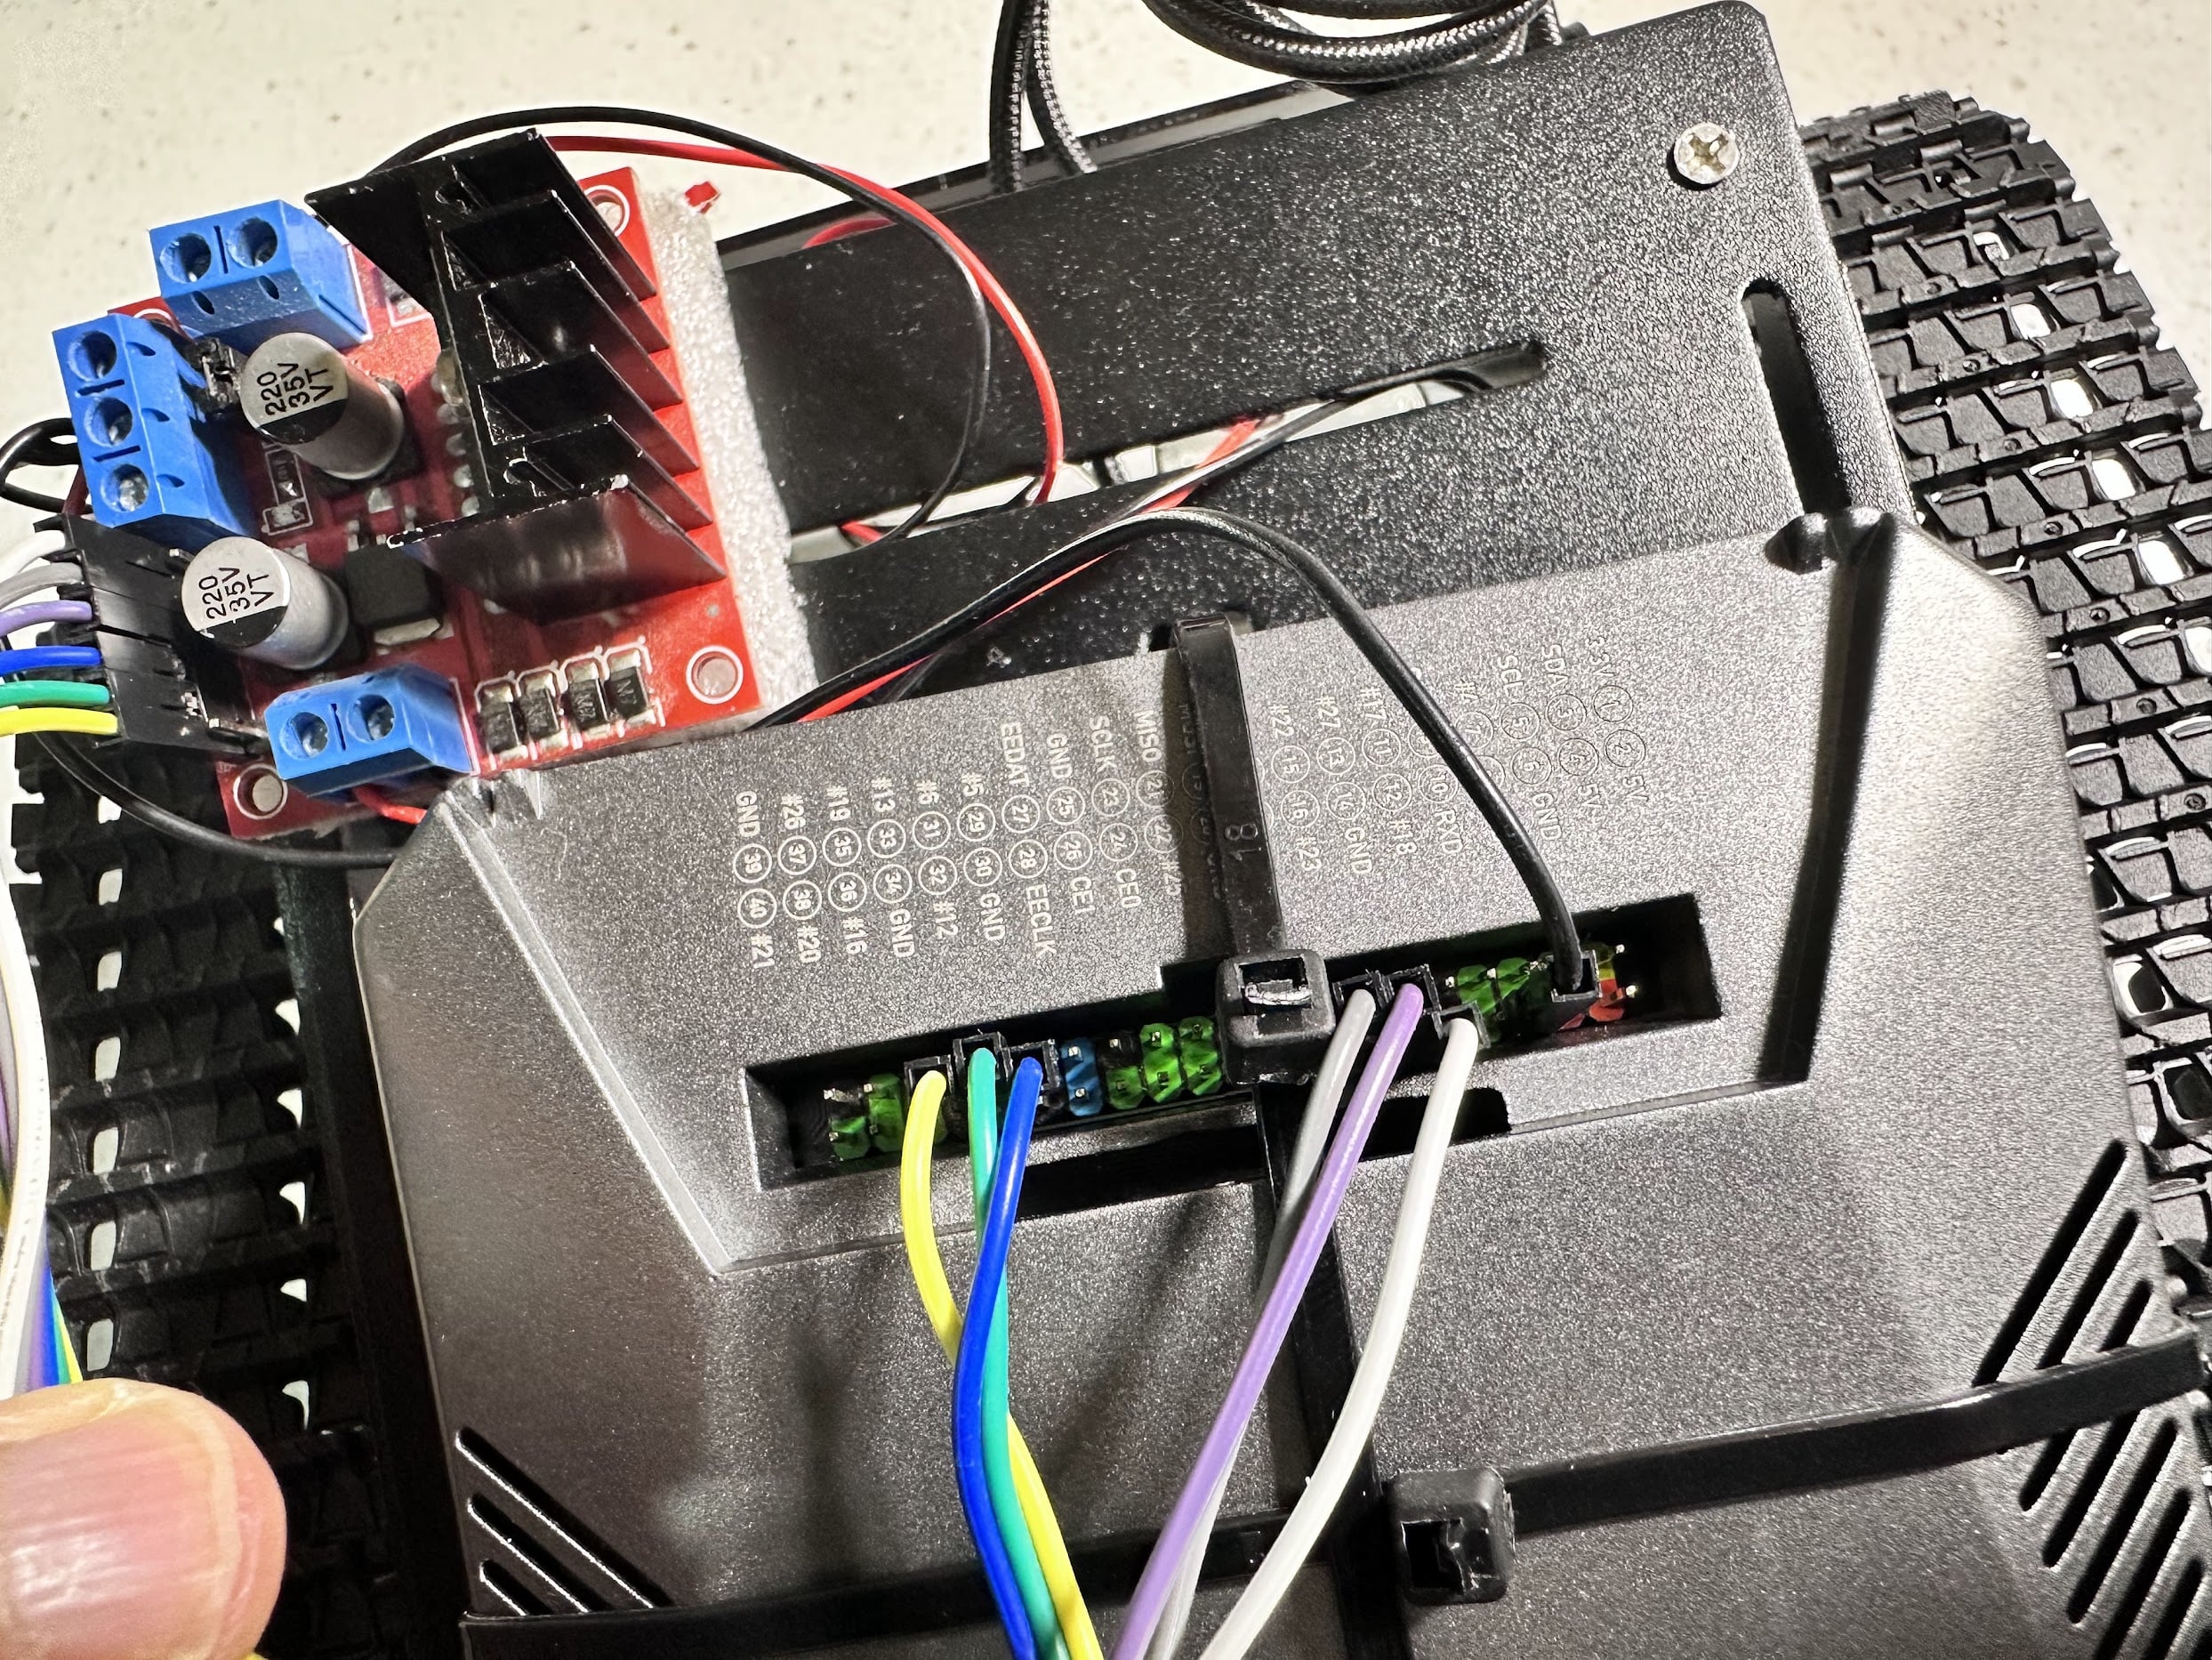
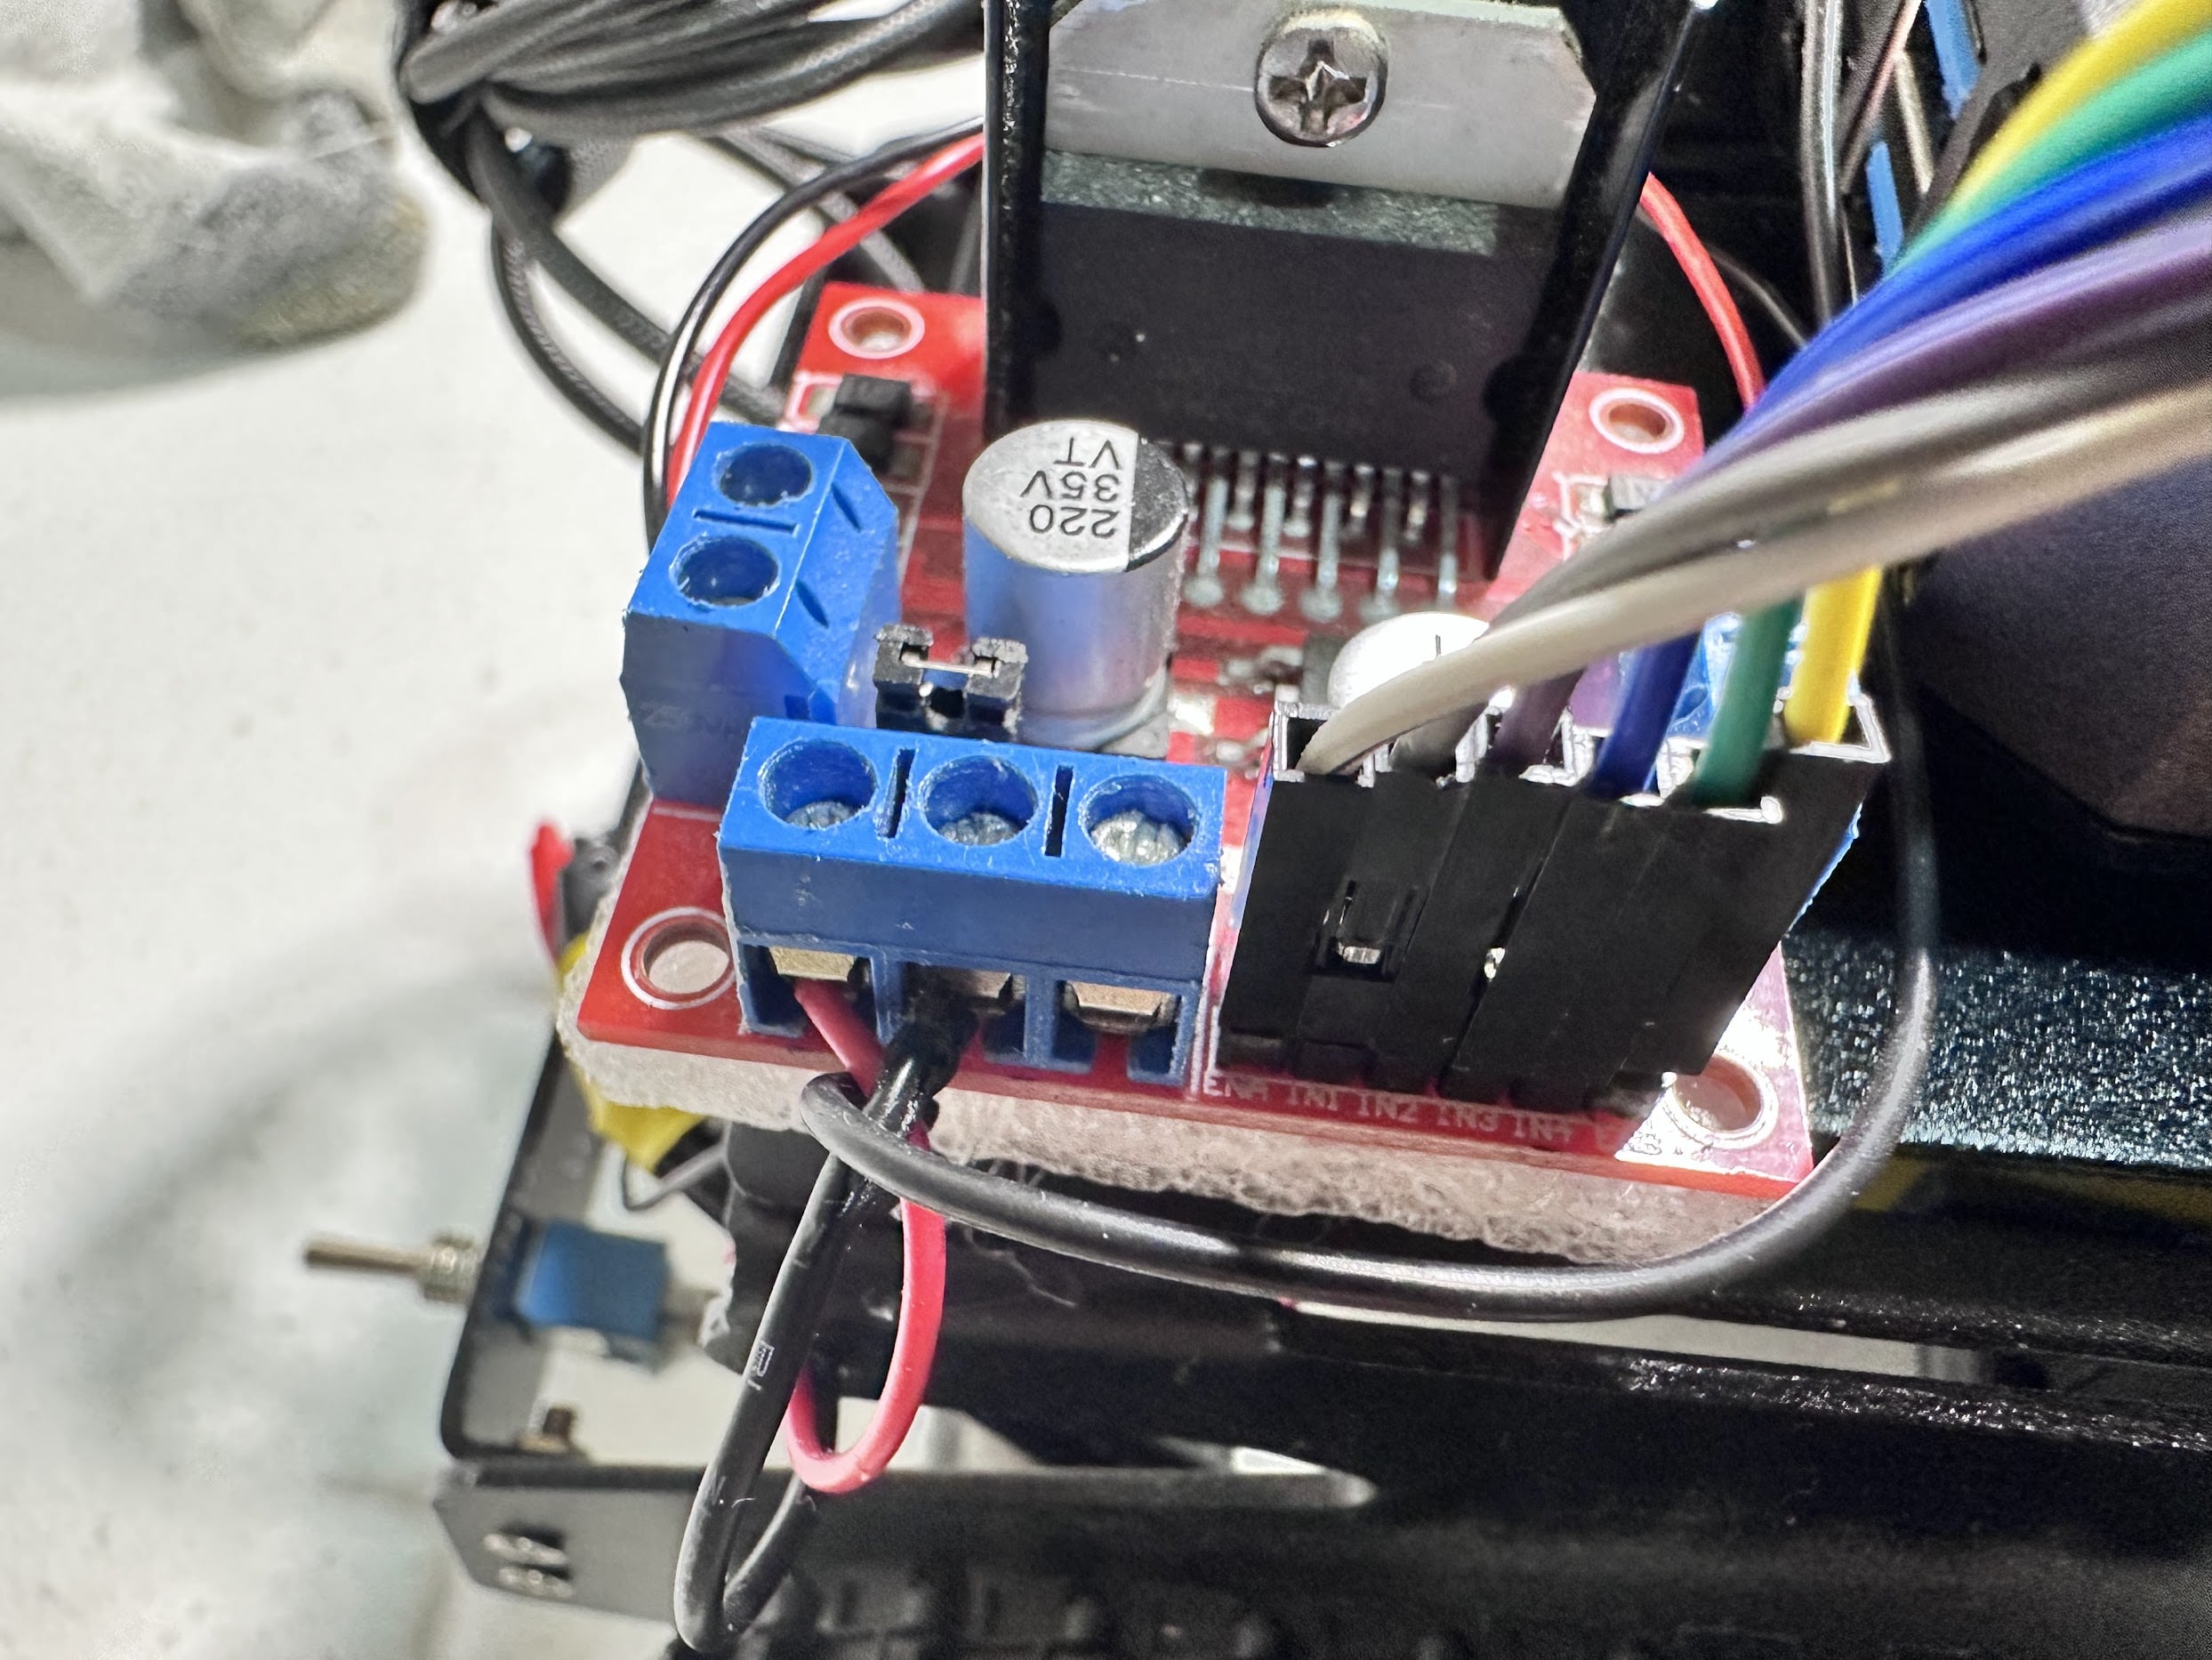
Wiring Setup
Follow these GPIO connections for the L298N motor driver:
| Pi GPIO | L298N Connection |
|---|---|
| GPIO 17 | IN1 |
| GPIO 27 | IN2 |
| GPIO 18 | ENA |
| GPIO 5 | IN3 |
| GPIO 6 | IN4 |
| GPIO 13 | ENB |
Ensure your power source is safely connected to the L298N (12V and GND terminals).
Code for Pi Tank Control
Here's the complete Python script to control your tank and stream video via Flask:
import threading
import time
from flask import Flask, Response, render_template_string, request
from picamera2 import Picamera2
import cv2
import RPi.GPIO as GPIO

# GPIO setup
in1, in2, en_a = 17, 27, 18
in3, in4, en_b = 5, 6, 13
GPIO.setmode(GPIO.BCM)
GPIO.setup([in1, in2, en_a, in3, in4, en_b], GPIO.OUT)
right_pwm = GPIO.PWM(en_a, 100)
left_pwm  = GPIO.PWM(en_b, 100)

# Set the value of the PWM to 50% duty cycle. You can adjust this value as needed.
right_pwm.start(50)
left_pwm.start(50)

def stop(): GPIO.output([in1, in2, in3, in4], GPIO.LOW)
def move_forward(): GPIO.output([in1, in4], GPIO.HIGH); GPIO.output([in2, in3], GPIO.LOW)
def move_backward(): GPIO.output([in2, in3], GPIO.HIGH); GPIO.output([in1, in4], GPIO.LOW)
def move_right(): GPIO.output([in2, in4], GPIO.HIGH); GPIO.output([in1, in3], GPIO.LOW)
def move_left(): GPIO.output([in1, in3], GPIO.HIGH); GPIO.output([in2, in4], GPIO.LOW)

class FrameProducer(threading.Thread):
    def __init__(self, picam2, fps=24, quality=70):
        super().__init__(daemon=True)
        self.picam2 = picam2
        self.interval = 1.0 / fps
        self.quality = quality
        self.frame = None
        self.lock = threading.Lock()
        self.running = True

    def run(self):
        while self.running:
            img_rgb = self.picam2.capture_array()
            img_bgr = cv2.cvtColor(img_rgb, cv2.COLOR_RGB2BGR)

            # Flip the image for a mirror effect
            # This is optional and can be removed if not needed
            img_bgr = cv2.flip(img_bgr, -1)

            ret, buf = cv2.imencode('.jpg', img_bgr, [cv2.IMWRITE_JPEG_QUALITY, self.quality])
            if ret:
                with self.lock:
                    self.frame = buf.tobytes()
            time.sleep(self.interval)

    def stop(self):
        self.running = False

app = Flask(__name__)

HTML_TEMPLATE = """
<!DOCTYPE html>
<html>
<head><title>Pi Tank Control - Collvy</title></head>
<body style="text-align:center;font-family:sans-serif;">
<h1>Pi Tank Live Feed & Control</h1>
<img src="/video_feed" width="800" height="600" />
<p>Use <strong>W/A/S/D</strong> to move, release to stop.</p>
<script>
document.addEventListener('keydown', e => fetch('/move/'+({'w':'forward','a':'left','s':'backward','d':'right'}[e.key]||'')));
document.addEventListener('keyup', e => fetch('/move/stop'));
</script>
</body>
</html>
"""

@app.route('/')
def index(): return render_template_string(HTML_TEMPLATE)

def gen_frames():
    while True:
        with producer.lock: frame = producer.frame
        if frame:
            yield (b'--frame\r\nContent-Type: image/jpeg\r\n\r\n' + frame + b'\r\n')
        else: time.sleep(0.01)

@app.route('/video_feed')
def video_feed(): return Response(gen_frames(), mimetype='multipart/x-mixed-replace; boundary=frame')

@app.route('/move/<cmd>')
def move(cmd):
    {'forward':move_forward,'backward':move_backward,'left':move_left,'right':move_right,'stop':stop}[cmd]()
    return ('', 204)

if __name__ == '__main__':
    picam2 = Picamera2()
    picam2.configure(picam2.create_preview_configuration(main={"size": (800, 600)}))
    picam2.start()
    producer = FrameProducer(picam2)
    producer.start()
    app.run(host='0.0.0.0', port=8000, threaded=True)
Save this as app.py and run with:
sudo python3 app.py
Access via http://<raspberry_pi_ip>:8000/
Conclusion
Congrulation!! You've successfully built a Raspberry Pi Tank with real-time camera streaming and web-based control. Experiment further by adding sensors, autonomous capabilities, or enhancing the UI for a more interactive experience!
Project images